![]()
LITTLE SPECIAL EQUIPMENT IS NEEDED to start creating useful, plant-based preparations at home, but you will want to prepare your working area and acquire a few necessary items before you start to gather your herbs. The basic kit (see here) lists essential pieces of equipment and explains how they are used. The recipes in this book assume you have the basic kit, noting only additional “speciality” items not on this list.
Before you move on to the recipe section, you will need some knowledge of the key techniques herbalists use to extract and preserve an herb’s wonderful properties. The following pages are dedicated to this, and you will be referred back to this section frequently during the course of the book.
KEY PRESERVATION TECHNIQUES
A domestic alchemist can extract and preserve the properties he or she needs from plants in various ways. The materials you choose will affect the quality of the final product. Try to choose organically grown ingredients wherever possible, and use raw (unpasteurized) honey and apple cider vinegar for anything taken inside the body. Water used for making any preparation should be of good quality; unless you have access to pure spring water, filtered is best, being both cleaner than average tap water and more environmentally friendly than bottled water.
HERBAL INFUSIONS
Leaves and flowers as well as ground roots and barks can be made into infusions (also called teas or tisanes). These can be prepared with fresh or dried herbs.
Hot Infusions
Unless instructed otherwise, teas in this book are to be made as follows:
Put 1 tsp. dried herb material or 2 tsp. fresh into a teapot or saucepan with a lid. Cover with a mug of boiling water and let sit with a lid on to infuse or brew for 10 minutes. Strain before use.
If a stronger tea is required, the traditional dose is 1 oz. dried herb or double the quantity of fresh steeped in 21/3 cups water. Some recipes call for these stronger herbal infusions.
Cold Infusions
Cold infusions are made by steeping herbs in cold water for 2–3 hours. They are usually made with fresh flowers and leaves.
Decoctions
Parts of the plant that are tougher (such as roots and barks) need to be boiled in water. This is known as a “decoction,” although it can also be called a tea. Decoctions can be made with similar amounts as the teas above, but a little extra water is added to allow for evaporation while simmering. In making decoctions, the plant matter is put into a saucepan with water, covered with a lid, heated, and then simmered for 10–15 minutes.
After the infusion or decoction is made, usually (but not always) the liquid is strained off and the solid plant matter discarded (for composting). If the liquid is being used in an eye bath or a cream, it should be strained through a strainer lined with cheesecloth or thin cotton cloth (see here) to make sure absolutely no small parts remain.
Infusions and decoctions can be drunk hot or cold, applied externally as lotions or washes, and used in the making of other preparations, such as creams. They keep for 3 days in the refrigerator. If you bottle them hot into sterilized bottles (see here), you can keep the unopened bottles for up to a month.
Aromatic Waters
It is exciting to turn a tea or decoction from an aromatic herb into a “water,” which involves distillation. A simple method using an adapted pressure cooker is described with the recipes. Aromatic waters can keep for anywhere between 3 months and 2 years.
BASIC KIT
RACK, STRING, PAPER BAGS, SELECTION OF GLASS JARS, AND STORAGE CONTAINERS, LABELS
Freshly picked herbs can be tied together and hung from a rack to dry. When dried, store in paper bags or glass jars with tightly fitting lids, away from direct sunlight.
Jars are also used to store tinctures, vinegars, and infused oils; you may want large ones for this purpose—old candy jars work well. Small jars are useful for storing creams; bottles for liquid preparations. You may also need old shampoo bottles and so forth, plus spray bottles and dropper bottles. Almost everything you make will need a label.
Whatever you use to store your preparations needs to be particularly clean. It is absolutely essential to sterilize bottles or jars used for storing syrups, glycerin, tinctures, jellies, creams, and ointments (see here).
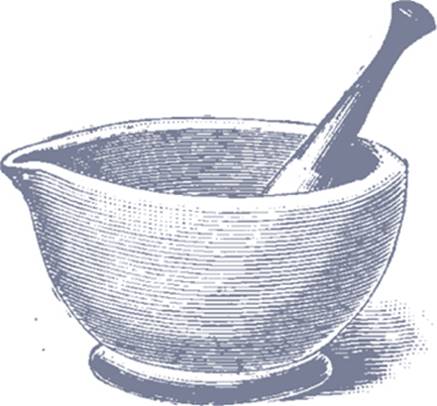
COFFEE GRINDER
For grinding dried herbs and roots. Ground herbs are used in infusions, oil blends, chocolates, snuff, scouring powder, medicines, and foods.
TEAPOT OR COVERED SAUCEPAN (OR A TEA INFUSER IF FOR ONE PERSON)
For brewing infusions (herbal teas).
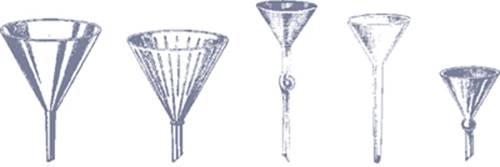
FUNNELS
For pouring and straining. You need both large and small to fit the necks of storage bottles.
CHEESECLOTH OR THIN COTTON CLOTH
For straining potions. Use squares of cheesechloth, large cotton handkerchiefs, or dish towels.
SIFTERS AND STRAINERS
Metal sifters and strainers, from tea strainer size upward, are useful for straining. (A small wine press, of the kind normally used for home brewing, is good for pressing out tinctures, infused oils, etc.)
COOKING IMPLEMENTS
For brewing up mixtures, use pots, saucepans, heat-resistant stainless steel or silicone spatulas and spoons, and a potato masher.
DOUBLE BOILER/WATER BATH
For heating potions gently, use a stainless steel double boiler or a “water bath,” a baking dish or saucepan filled halfway with water on the stove, with heat-resistant bowls containing your potions inside it.
MEASURING EQUIPMENT
A couple of accurate measuring cups and spoons for measuring dry and liquid ingredients. For medicinal tincture mixtures, use a narrow measuring cylinder.
DIGITAL SCALES
Some recipes require accurately weighed ingredients. Digital scales for home use can now be found in some larger department stores and online for people following weight-loss diets.

Sterilizing
It is very important to sterilize equipment properly before preserving any plant material, as failure to do so will not only lessen the shelf-life of your product, but could also potentially cause food poisioning.
Sterilize items immediately before use. Cool jars/bottles first for cold preparations, but always pour hot preparations (jellies, hot oils, syrups, etc.) into hot jars or bottles. You can sterilize items in a number of ways:
1 Remove any plastic lids and cook clean glass bottles and jars in the oven, preheated to 275°F, for 20–30 minutes.
2 Boil in water for 10 minutes (boil lids separately). Keep bottles and lids covered by water until just before use.
3 Use a microwave or dishwasher; check the manufacturer’s instructions before proceeding.
The United States Department of Agriculture details safe canning methods on their website (www.usda.gov).
HERBAL TINCTURES
Plants’ qualities can be extracted and preserved using alcohol. Tinctures, as they are known, were traditionally made by boiling herbs in wine, but are now produced by steeping the herb in a solution of alcohol and water. Herbalists use variable concentrations of alcohol for different plants, from solutions of 15–25 up to 190 proof alcohol for resins. (Resins are substances exuded from certain trees, many of which have strong antiseptic and healing properties, such as myrrh.)
Producing tinctures at home usually means using store-bought alcohol. Always aim to use organic alcohol. The best one is vodka because it has little taste, although any strong alcohol will do. Vodka is usually about 80 proof.
If you are making a tincture with fresh plant material (called a “specific tincture”), the water in the plant will even things out nicely down to a tincture of 50–60 proof. If you are using dried herbs, however, you may want to add 1/3 cup/85ml water to dilute each just over 3/4 cup/200ml alcohol. Alternatively, dilute with an infusion or decoction of the herb, which gives you a combination of tea and tincture in one remedy.
Make tinctures by covering plant material with between two and five times the amount of alcohol solution in a large jar with a well-fitting lid. It is best to use weights for the amount of herb used. A general guide could be 7 oz. dried herb (101/2 oz. fresh) to each 1 quart alcohol solution.
Let sit in a cool, dark place for at least 3 weeks, turning upside down or shaking the jar once a day. (Many traditions encourage talking or singing to the plants as you do this.) After 3–8 weeks, strain the liquid through a strainer or funnel lined with thin cloth. Pull the edges of the cloth up and around the macerated herbs, then twist, wring, and press it to extract all of the liquid. Store in a clean bottle.
Fluid extracts are tinctures made with equal amounts of plant material to alcohol. They can be made by double infusing (see here).
Tinctures are used in creams, lotions, and liniments, or taken internally. Even a small dose of tincture is effective.
Some herbalists work entirely with drop doses, and some herbs are taken only in drop doses (such as 5–20 drops, 1–3 times daily); always use drop doses for children. Many herbalists use a standard adult dose of 1 tsp/5ml mixed in 2 tbsp./30ml hot or cold water, taken once a day for a tonic or preventive or 3 times a day for chronic ailments. For acute conditions, 1–2 tsp/5–10ml can be taken 3–6 times daily.
Tinctures are often mixed together in blends; there are many recipes for blends in this book. You can either buy in the tinctures to make them or produce your own, using the guidelines above. For these blends, herbalists tend to use only milliliters (ml) as measurements, as this is the easiest and best way. You can make them with teaspoon measures (1 tsp. = 5 ml, 1 tbsp. = 15ml) but it is quite fiddly. If you are regularly making these mixtures, I suggest you buy a 100ml plastic measuring cylinder (they cost about $2.50).
Not everyone can tolerate, or want to take, alcohol, in which case tinctures can be made with the same quantities of glycerin.
Many leading herbalists tailor-make tinctures each time instead of using standard amounts; as the American herbalist Matthew Wood, author of The Book of Herbal Wisdom (1997), explains: “I look for the distinctive taste of every plant in the extract. Therefore, I make the tincture to the ‘right taste’ … I prefer to think of tinctures and other preparations by analogy to wine, not to pharmaceutical drugs.”
Tinctures can also be made into delicious alcoholic beverages that are pleasant to drink and have health-giving properties in small doses. These can be made with wine, mead (my personal favorite), or with any alcohol: gin (sloe gin is the famous one), brandy, vodka, rum, whiskey, if you like it, or the local home-distilled schnapps. Usually, a little honey or sugar is added while the tincture is steeping, otherwise the method is the same.
Kept in a cool place away from the sun, a well-made tincture will keep for at least 2 years, some many more.
HERBAL VINEGARS
Vinegars are a useful medium for extracting and preserving herbs; they are used in foods, taken as supplements or medicines, and used in many home-cleaning products and hair and skin tonics.
Vinegar, especially raw (unpasteurized) organic apple cider vinegar, is good for you inside and out. Taken internally, it can encourage a healthy pH balance, reduce inflammation, boost immunity, and regularize metabolism. Taken with food, it enables you to absorb minerals better. Externally, it can bring bruises to the surface, cool and reduce swellings, and benefit the hair and skin.
Herbal vinegars are made like tinctures. Steep the herb in 2–3 times the amount of vinegar. Let sit for 2–4 weeks in a cool, dark place, then strain through cloth. As medicines, the dose is the same as for tinctures (see here). Vinegars can keep for at least 2 years.
COMPRESS & POULTICE
Vinegars, tinctures, and teas can be used to make a compress. Soak a cloth in the herb liquid, lay it, heated or cold, against the skin, and secure with a suitable bandage. It will help to soothe aches and pains, sore throats, headaches, and skin conditions.
Fresh plant material can be used to make poultices—mashed or crushed herbs applied to the body alone. Poultices can stay in place for 2–3 days, although many choose to replace them daily.
oxymels
An oxymel is a tasty remedy that combines the healing properties of an herbal vinegar with honey—itself a miraculous substance, known to be antibiotic and encouraging to the immune system. Oxymels are made by gently warming an herbal vinegar with an equal amount of honey until the honey is dissolved. In sterile bottles (see here), oxymels keep for 2 years.
INFUSED OILS
Infused oils, made in the same way as tinctures and vinegars, can be used alone or in ointments, creams, liniments, and lotions.
To make, combine 1 part herb with 2–3 parts vegetable oil, then let sit for 4–8 weeks to infuse. Infused oils are mostly made in the shade, because vegetable oils may spoil, but some need sunlight to work properly. The recipes in this book will say if sun is required. Once infused, strain and press through cloth, as described for tinctures (see here).
You can make an infused oil more quickly by gently heating the herb in the oil, usually in a double boiler or water bath (see here), for 2–4 hours.
Many vegetable oils can be used to make an herbal infused oil. The most commonly used include olive, almond, sunflower, coconut, safflower, canola, grapeseed, sesame, and jojoba. The base oils all have medicinal properties of their own, and I recommend researching which oil will best offer what you require. Always use the best organically grown, cold-pressed oil that you can afford. Olive oil infusions can keep for up to a year before they start to become rancid, and coconut infusions can keep for 2 years, but most others will spoil in a few months.
Sometimes a “double infusion” is made to obtain a higher-strength product. In such cases, the infused oil is made and then used to infuse a fresh quantity of plant material. (This can also be done with tinctures, vinegars, and all water-based preparations.)
An infused oil can be made into a salve, balm, or ointment by addition of an emulsifier, such as beeswax. The more wax you use, the harder the ointment becomes. For a soft salve, 8–10 percent wax to oil is used.
LINIMENTS
Liniments are warming, stimulating rubs for aches and pains. They rub in easily and are lighter than an oil, so are useful for covering large areas. Liniments are made by mixing an infused oil and a tincture or vinegar. The two will naturally separate in the bottle, so they need to be shaken before each use. How long a liniment keeps for will depend upon the base oil (such as olive oil, almond oil) you’re using.
CREAMS
Creams can be difficult to make successfully. They mix oil and water components, which require an emulsifier. The purist natural cream maker will use beeswax and a serious amount of whisking instead of a manufactured emulsifier.
To make creams the old-fashioned way, heat the oil and water components separately to a similar temperature using a double boiler or water bath (see here); in a double boiler, you can heat the water part in the bottom and the oil in the top. Then pour the water part slowly into the oil part, whisking furiously. Once the oil and water are mixed, the cream is usually quickly cooled by placing the mixing bowl into a cold bath (a pan of cold water). Usually, you continue to whisk while cooling, and until the cream is formed, then put into sterilized jars.
Using a store-bought emulsifying wax makes cream making a simpler process. This is a substance used in cosmetic manufacturing; you can buy it made from pure vegetable sources, but because it is a “man-made” ingredient, purists tend to spurn it.
How long creams keep for varies greatly. Those made with long-lasting coconut oil, for example, could keep for a year; with some other oils, creams may last for only 1–2 months, unless a preservative is added.
SOAPS
Soap basically consists of vegetable oils that have been saponified (turned into soap) with a strong alkaloid known as lye. Soap making is easy to pull off successfully; however, it involves a lot of steps and some substances that need handling and measuring carefully. For this reason, ingredients for soaps are weighed, and you’ll need a digital scale to make them.
Solid soap is made via a “cold process” using sodium hydroxide, which involves a lot of stirring and no heat. Liquid soap uses potassium hydroxide in a “hot process,” which involves a lot of stirring and the use of a slow cooker to provide heat. Herbs and essential oils are then added after the oils and lye have been mixed. Soaps keep for years, but they will lose their smell over time as the essential oils evaporate.
SYRUPS, HONEYS & CANDIES
Sugar and honey can be used in various ways to preserve plants. Both can be used to make syrups that are soothing and nourishing, particularly for the throat and chest, and are good for preserving vitamin C.
A simple syrup is made by boiling a 65 percent sugar and water solution (that is, one that contains twice the quantity of sugar to liquid) for 3–5 minutes, or by first making a strong infusion or decoction and then boiling this with the sugar.
When making a syrup with raw honey, do not boil, because this destroys its healthful enzymes. Just add an equal amount of honey to a strong herbal decoction or infusion and then heat the mixture gently to dissolve. Infused honeys can also be made simply by mixing the honey and the herbs and letting infuse for a few weeks.
Store the syrup in sterilized bottles (see here), first putting the lids on loosely, then tightening when cold. 65 percent sugar syrups keep well. You can also make a 40–50 percent syrup that will keep fairly well unopened if it is thoroughly sterilized. Syrups tend to spoil quickly once opened, so store your syrup in several smaller bottles instead of one large bottle to help improve its shelf life.
Syrups can also be sterilized again once bottled to preserve them further. Set the lids on loosely, then place the bottles on layers of paper in a saucepan (the water should reach three-quarters of the way up the bottles’ sides). Simmer for 10 minutes, then immediately remove from the heat and tighten up the lids.
Candies are made from a 65 percent syrup that has been boiled for a long time. Sometimes tinctures and essential oils may be added in at the end. Some recipes use half sugar, half golden syrup or light corn syrup.
Boil the syrup for 20–30 minutes to evaporate the water, leaving more and more sugar in the mix. This then goes through several stages. The “hard-ball” stage, which is the minimum needed for candies, occurs after this 20–30 minutes, so start testing after 15 minutes. To test, drop a little of the mixture into cold water and watch.
At “hard-ball” stage, the mixture makes a ball shape; it keeps its shape but feels sticky to the touch. The next stage, known as the “soft-crack” stage, can occur minutes later. The mixture now solidifies into threads that are flexible to the touch and will bend a little before breaking. The third stage, known as the “hard-crack” stage, occurs minutes after this. At this point, the threads break immediately. Because the three stages occur in quick succession, I recommend testing your mixture every few minutes after you reach the “hard-ball” stage.
Anywhere between “hard-ball” and “hard-crack” stage works for herbal candies; after that you are in burning territory. As the “hard-ball” stage is sufficient, pour your mix onto a lightly oiled baking tray when you reach this point, scoring both ways to make small lozenge shapes as it cools. Alternatively, pour into small molds and let set. If adding essential oils, do this just before pouring out. If adding honey to the mixture, I like to boil it a little longer until “hard-crack” stage is reached. Then add the honey just before pouring it out. When the contents are cold, they can be turned out and broken into pieces as necessary.
Keep the candies in a sealed container in a cool place with some confectioners’ sugar, cornstarch, or ground slippery elm to stop them from sticking together. Stored this way, they will last well for 3–4 weeks and up to 6 weeks.
Essential Oils
Essential oils are a valuable addition to many recipes. These are generally bought, because they are extracted by a complex distillation process; they contain potent properties from the plant, and are used in small quantities. They mix easily in fixed oils, but tend to float on top if mixed in a water preparation, unless emulsified in some way. First mixing the oils with a little vegetable glycerin can help. Essential oils are volatile and are lost by heating, so are added at the end of any recipes using heat. Some will strip paint or eat into rubber, so if you are experimenting with recipes, keep this in mind and be cautious.
LABELING & STORING
When you have finished making a product, be sure to label it with what it is and the date made; otherwise you will end up with a shelf full of lovely potions and lotions that you have no idea what to do with.
Unless the recipe says otherwise, store all products in a cool, dark place in an appropriate vessel—a sterilized bottle or jar with a tight-fitting lid, or an airtight container. This will ensure each product keeps at its best for as long as possible. Each recipe includes a recommended shelf life; this should be used as a guide, with common sense always prevailing. If a product starts smelling odd, discard it.
HOW TO USE THIS BOOK SUCCESSFULLY
There is a wide range of recipes in this book—from tincture blends and infusions to soaps and creams. To make them successfully, there is some important information you need to keep in mind.
INGREDIENTS
![]() Some recipes are made from fresh herbs, others are bought, and some use a mixture. Unless fresh or dried herbs are specified, it should be assumed that you can use either fresh or dried herbs for each recipe. If the amounts differ depending on whether you use fresh or dried, this will be stated.
Some recipes are made from fresh herbs, others are bought, and some use a mixture. Unless fresh or dried herbs are specified, it should be assumed that you can use either fresh or dried herbs for each recipe. If the amounts differ depending on whether you use fresh or dried, this will be stated.
![]() Many ingredients lists contain premade preparations: tinctures, infusions, and so on. Where a specific recipe for these appears in the book, you will be referred to it; otherwise, you will be referred back to the key preservations section (see here) for the standard technique.
Many ingredients lists contain premade preparations: tinctures, infusions, and so on. Where a specific recipe for these appears in the book, you will be referred to it; otherwise, you will be referred back to the key preservations section (see here) for the standard technique.
EQUIPMENT & METHOD
![]() Before you start making anything, gather together the basic equipment (see here). All the recipes assume you have this equipment on hand; only if you need something less common, will it be specified.
Before you start making anything, gather together the basic equipment (see here). All the recipes assume you have this equipment on hand; only if you need something less common, will it be specified.
![]() Some recipes are simple and others complex. In the interests of space, the various methods are described in full only once, and you will be referred back to it as required. Always carefully read the recipe and, if necessary, the general information found elsewhere in the book, before beginning.
Some recipes are simple and others complex. In the interests of space, the various methods are described in full only once, and you will be referred back to it as required. Always carefully read the recipe and, if necessary, the general information found elsewhere in the book, before beginning.
MEASUREMENTS
![]() Herbalism isn’t an exact science. Many herbalists do not work with rote amounts, tending to measure by eye to produce the desired result. With this in mind, most recipes—such as food, cleaners, and so on—use rough approximations.
Herbalism isn’t an exact science. Many herbalists do not work with rote amounts, tending to measure by eye to produce the desired result. With this in mind, most recipes—such as food, cleaners, and so on—use rough approximations.
![]() Some recipes, however, require that ingredients be very carefully weighed; this includes many medicines, all soaps (because you’re using caustic substances), and some creams (which can be hard to make). In such recipes, cup conversions or tablespoon measurements do not provide the necessary accuracy, so they have not been provided and their use is not advised.
Some recipes, however, require that ingredients be very carefully weighed; this includes many medicines, all soaps (because you’re using caustic substances), and some creams (which can be hard to make). In such recipes, cup conversions or tablespoon measurements do not provide the necessary accuracy, so they have not been provided and their use is not advised.
![]() Tablespoon and teaspoon measurements provided in this book are based on the following:
Tablespoon and teaspoon measurements provided in this book are based on the following:
1 tbsp. = 15 ml
1 tsp. = 5 ml
1/2 tsp. = 2.5 ml
I advise using standard kitchen measuring spoons for all recipes that require teaspoon or tablespoon amounts, and for doses.
![]() Adult doses are provided as standard for all remedies; children take the smaller end of the dose range, or 1/4–1/2 the adult dose, unless otherwise specified. See here for more details on doses, and see the box on here, “Taking Herbal Remedies.”
Adult doses are provided as standard for all remedies; children take the smaller end of the dose range, or 1/4–1/2 the adult dose, unless otherwise specified. See here for more details on doses, and see the box on here, “Taking Herbal Remedies.”
Taking Herbal Remedies
Herbal remedies can work remarkably well, and sometimes they work fast. Often they are not a quick fix, however, needing instead to be taken over weeks and months to achieve the desired effect. Recipes for medicines depend on empirical, traditional knowledge, some of which (but not all) is backed up by modern scientific research.
⋄⋄⋄⋄⋄⋄⋄⋄⋄⋄⋄⋄⋄⋄⋄⋄⋄⋄⋄⋄⋄
Responsibility for self-prescribing any of the remedies in this book falls solely with the reader.
⋄⋄⋄⋄⋄⋄⋄⋄⋄⋄⋄⋄⋄⋄⋄⋄⋄⋄⋄⋄⋄
If you are pregnant or breastfeeding, have any serious or long-lasting health condition, or if you are already taking medication, it is especially important to first seek the advice of a healthcare professional.
⋄⋄⋄⋄⋄⋄⋄⋄⋄⋄⋄⋄⋄⋄⋄⋄⋄⋄⋄⋄⋄